Sign In
What is it that makes a sewing project look really unique, special, and, dare I say… a wee bit fancy?
It’s all in the details, and the cool thing is that you can add really beautiful details to just about any sewing project.
I’m going to walk you through six vintage-inspired details that look impressive but are actually really easy to sew.

- A lace yoke
- A lace hem
- A drawstring cuff
- A ruffle neckline
- Turning gathers into small tucks
- A vintage hemstitch
I’m going to show you how to do each one, so watch the video below to see all the tutorials in detail. I also included some step-by-step instructions below the video player.
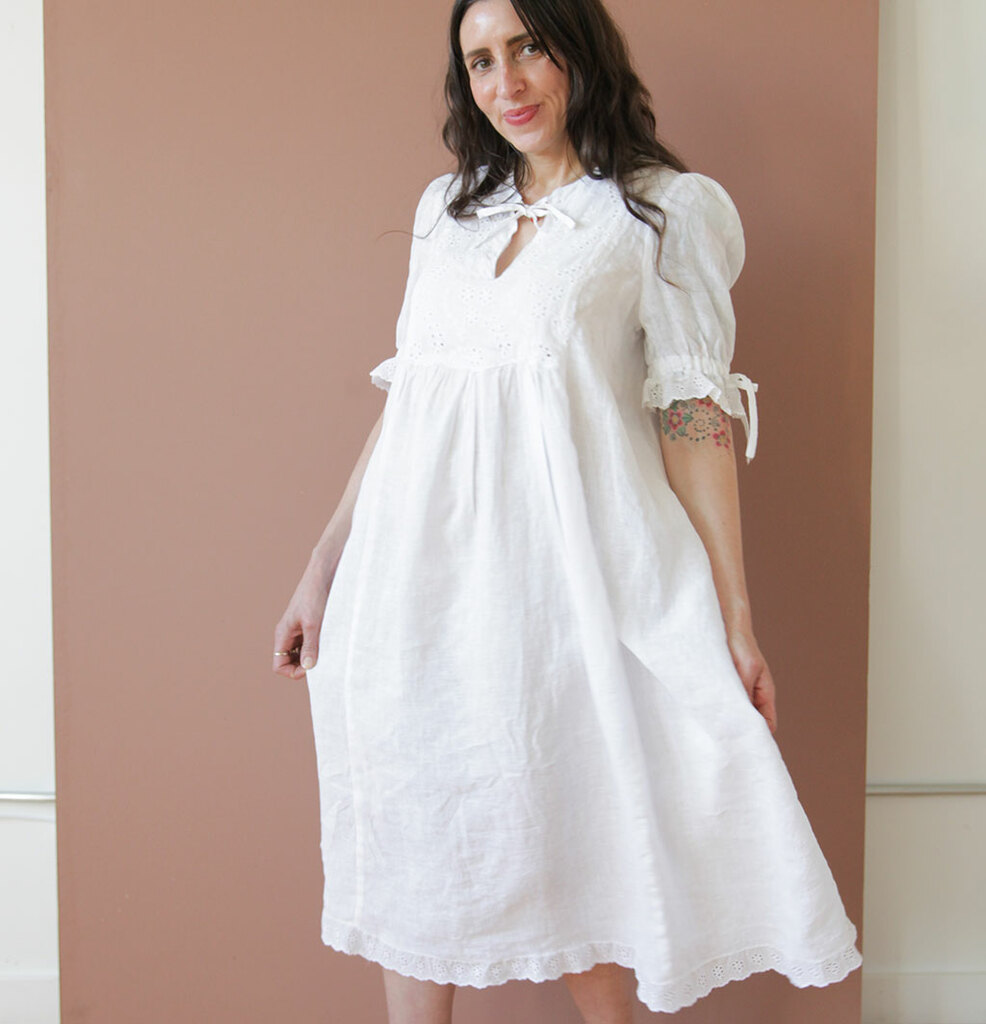
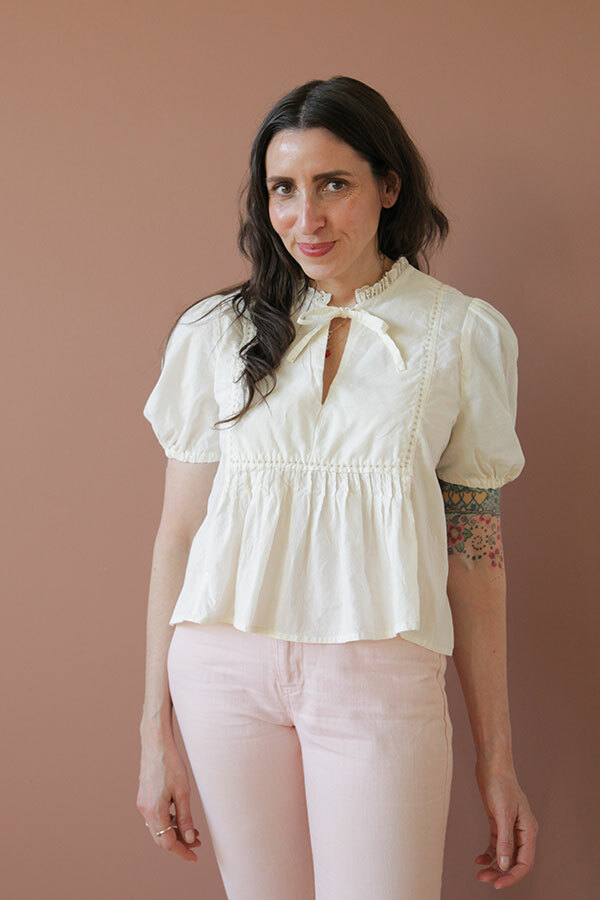
I added some vintage-inspired details to the Baker dress pattern, and I love it so much that I added even more vintage details to a version that I hacked into a top (keep an eye out for that tutorial soon).
Let’s start with the dress!
Detail 1: A Lace Yoke
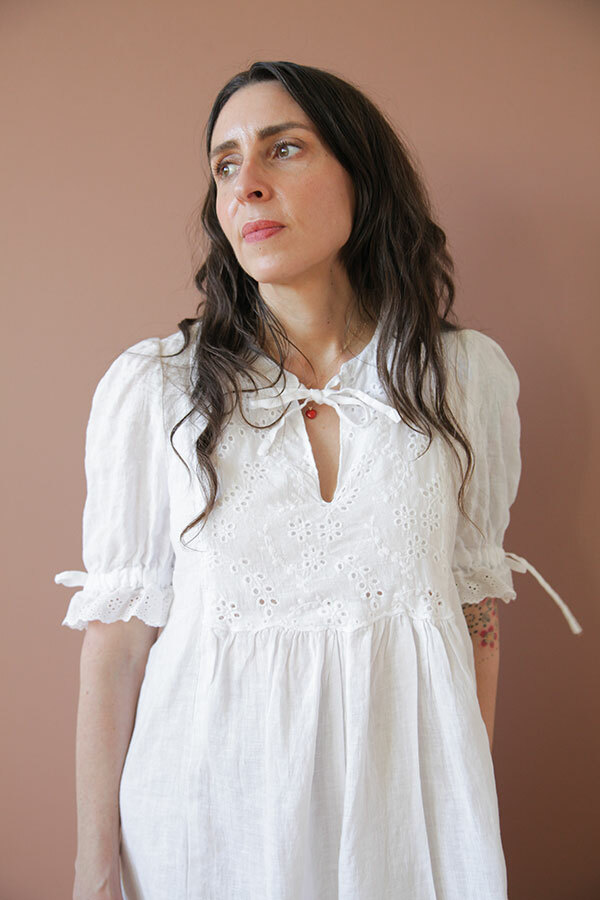

This is a simple one.
I used an eyelet lace for the outer yoke, but I also wanted to show off that lace border.
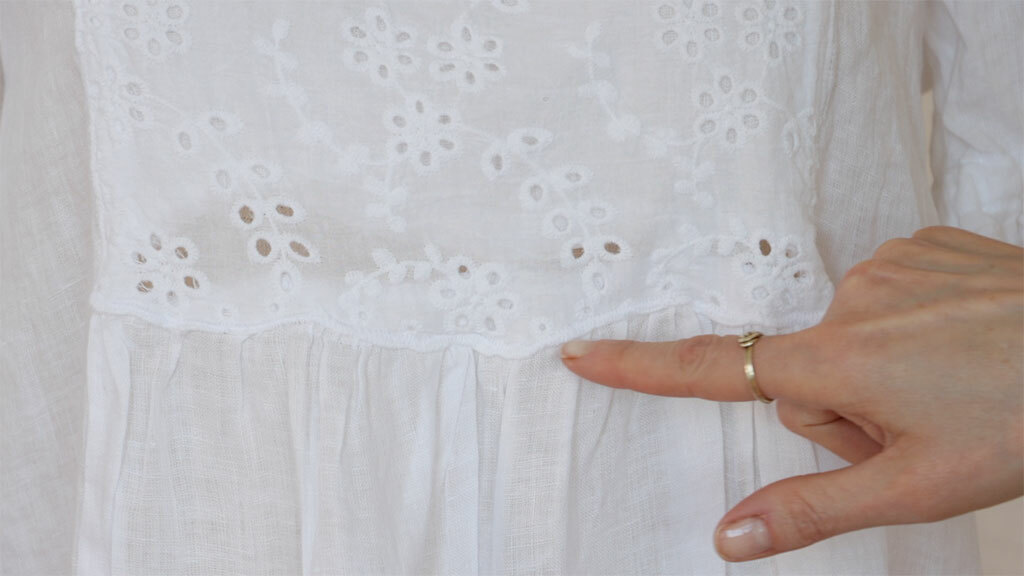
So, instead of sewing the yoke to the skirt with right sides together, all I did was layer the lace on top and stitch it down along the border.
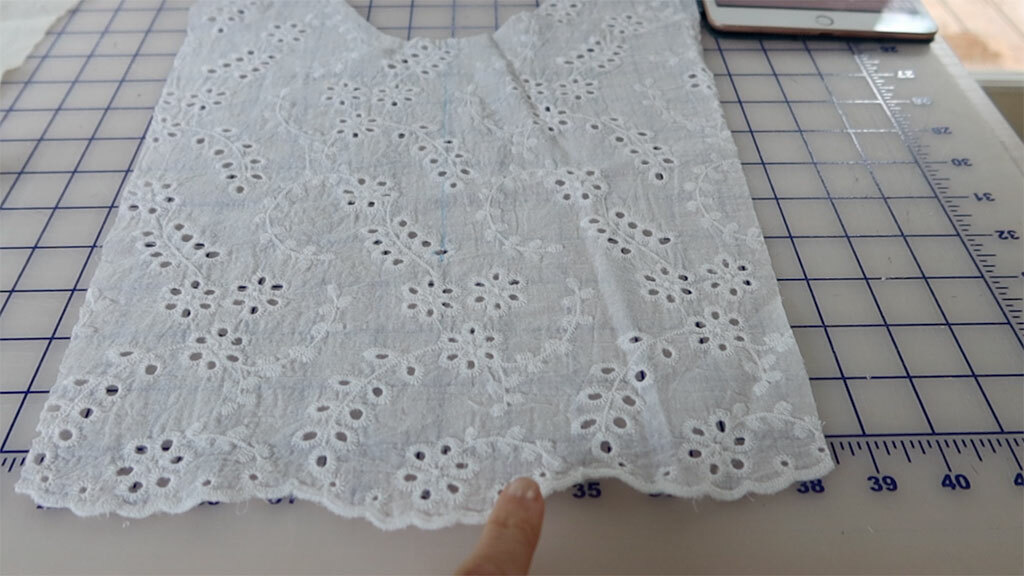
I used a zigzag stitch and stitched all along the scallops at the bottom, which attached the piece and finished the seam all at once.
This is super easy, and you could use this on any yoke.
By the way, if you want more ideas on using eyelet border, check out our other video all about eyelet.
Detail 2: A Lace Hem
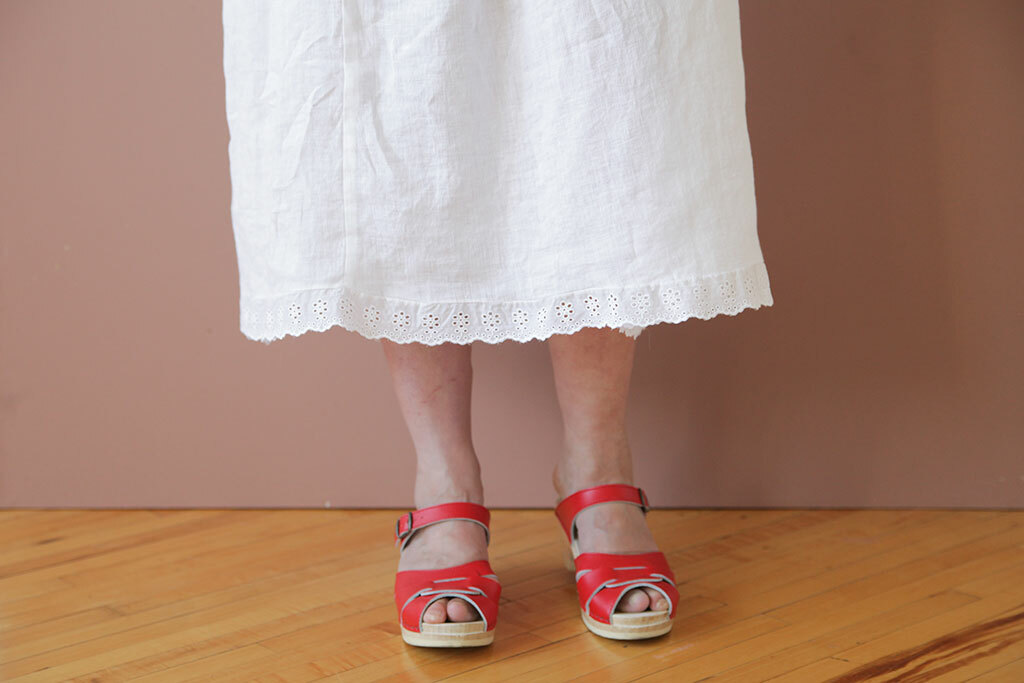
Here’s another easy one, but there’s a little trick to making it look good.
I sewed this eyelet lace trim to the cuffs and hem. One thing that can be tricky when sewing lace trims is that when you’re using light or sheer fabrics, the seam can be kind of bulky and obvious.
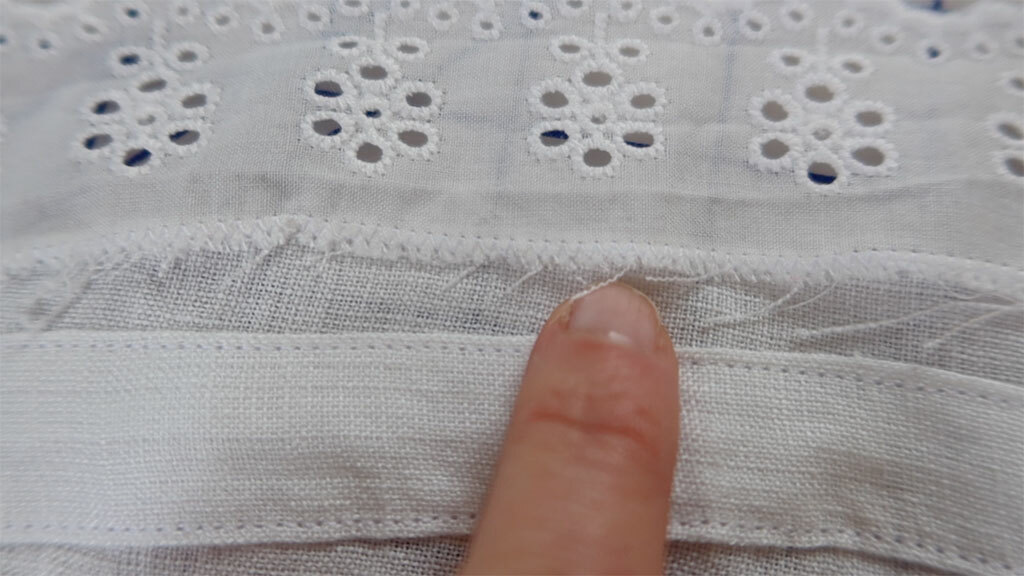
I also don’t want the serging to show. So, I use a narrow zigzag to sew the trim to the hem. I then trim any extra seam allowance off.
This gives you a very narrow finished hem that looks neat.
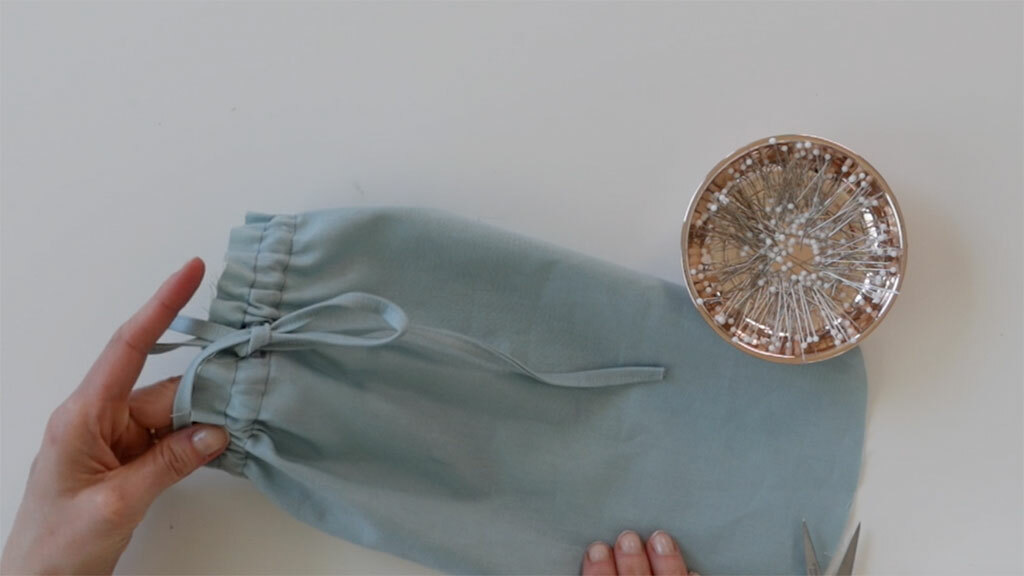
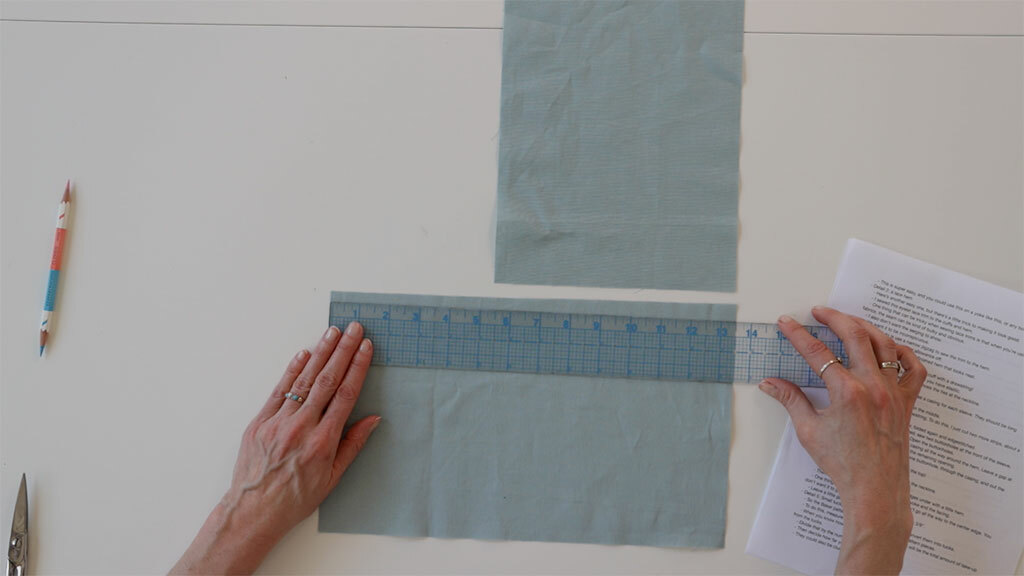
Detail 3: A Drawstring Cuff
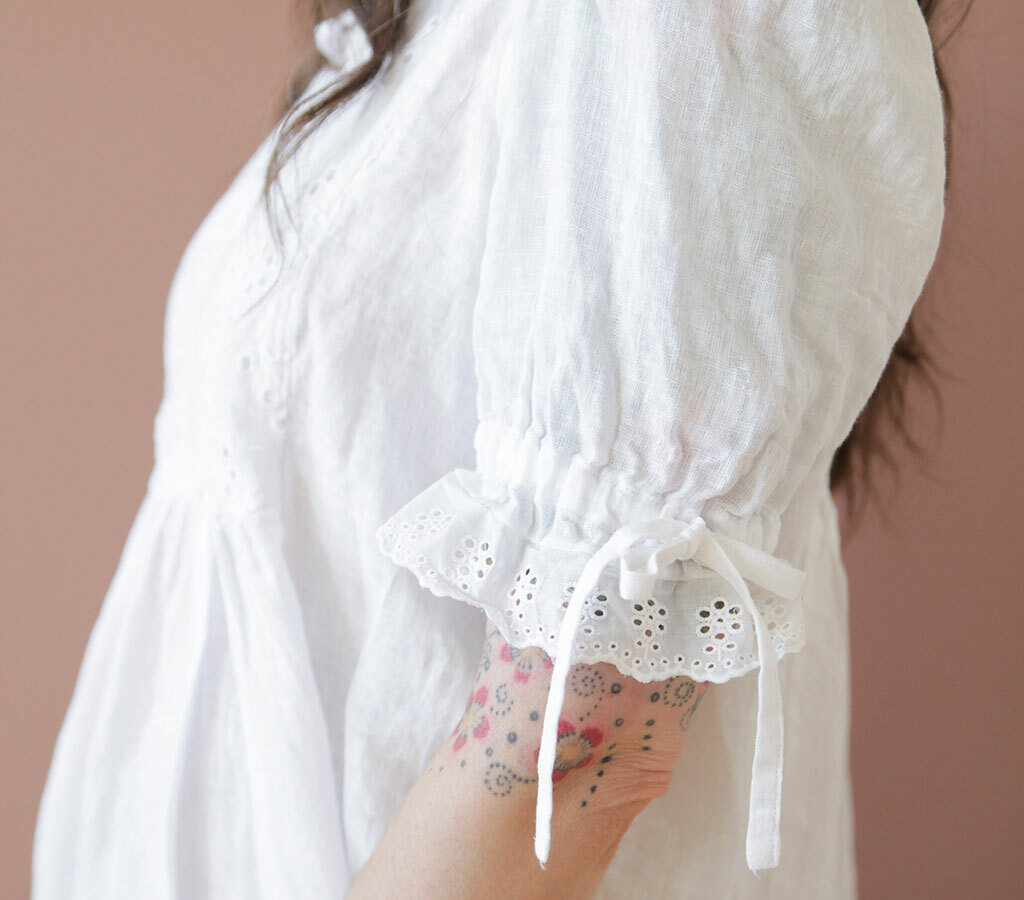
To add a delicate touch to the sleeves, I replaced the elastic in the cuff with a drawstring. You can do this just about anywhere you have an elastic casing.
I love the way it looks because it echoes the ties at the neckline.
Here’s how to do it.
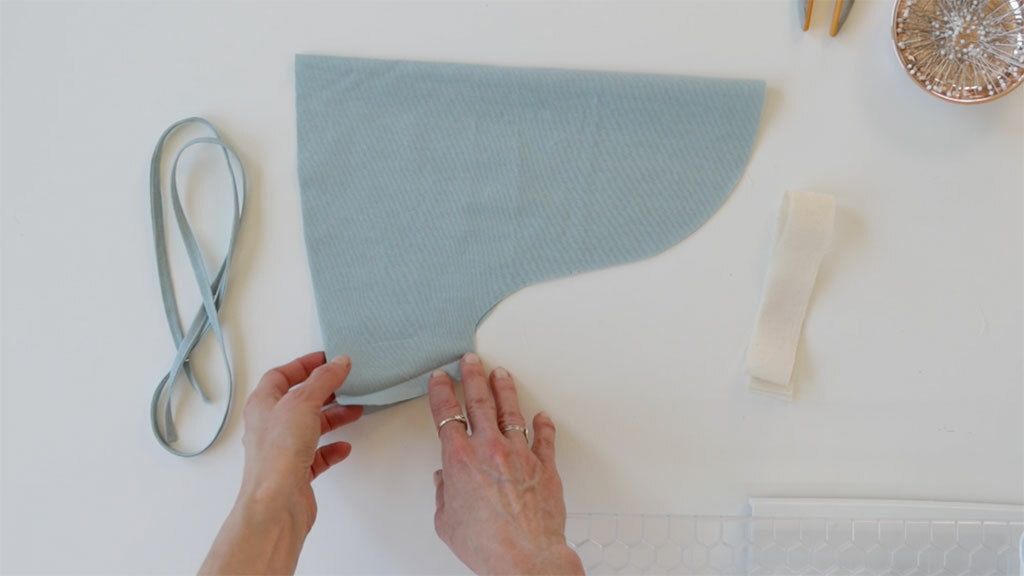
Cut two strips of fabric to use as casings for each sleeve. The strips should be long enough to extend across the hem and wide enough to accommodate your drawstring, plus seam allowance to turn under the long edges.

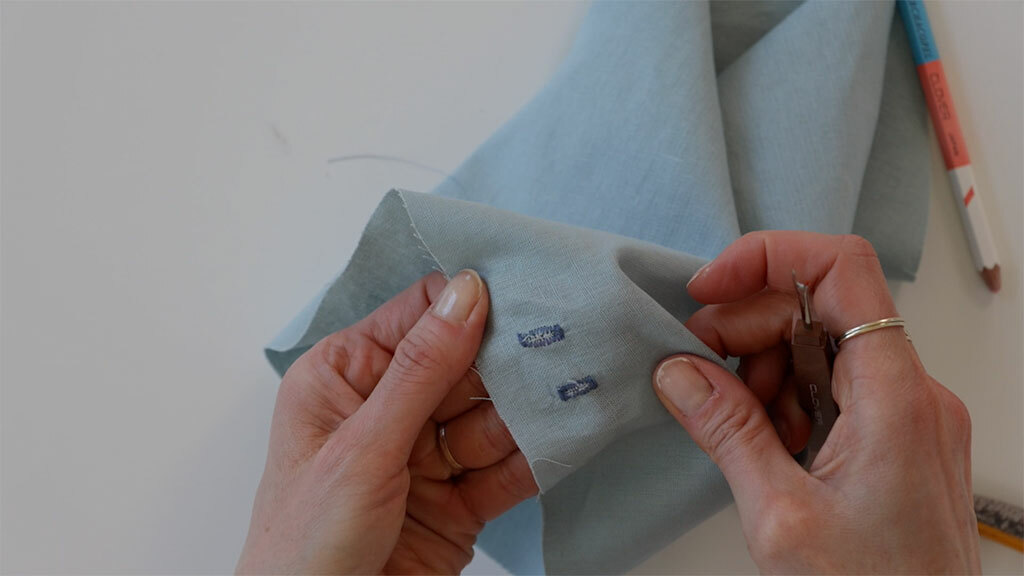
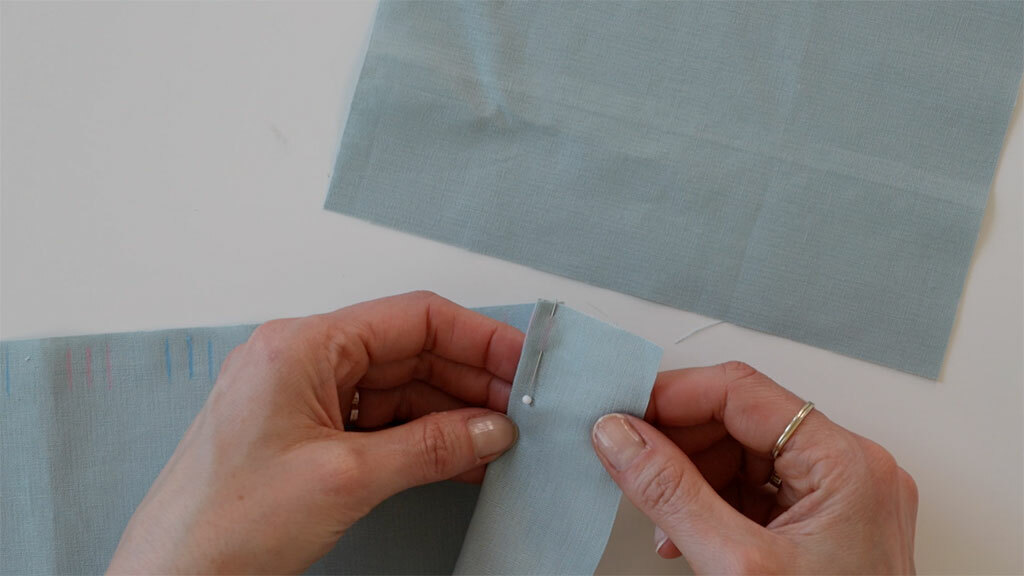
Construct two ties for your drawstring. To do this, I just cut two more strips, about a yard long each. I made them as wide as the ties for the pattern, which in this case was 1 1/2” (3.8 cm).
Fold the long edges together, fold again, and edgestitch.
Once your sleeve is constructed, sew two buttonholes at the front, wherever you want your drawstring to be.
Open the buttonholes.
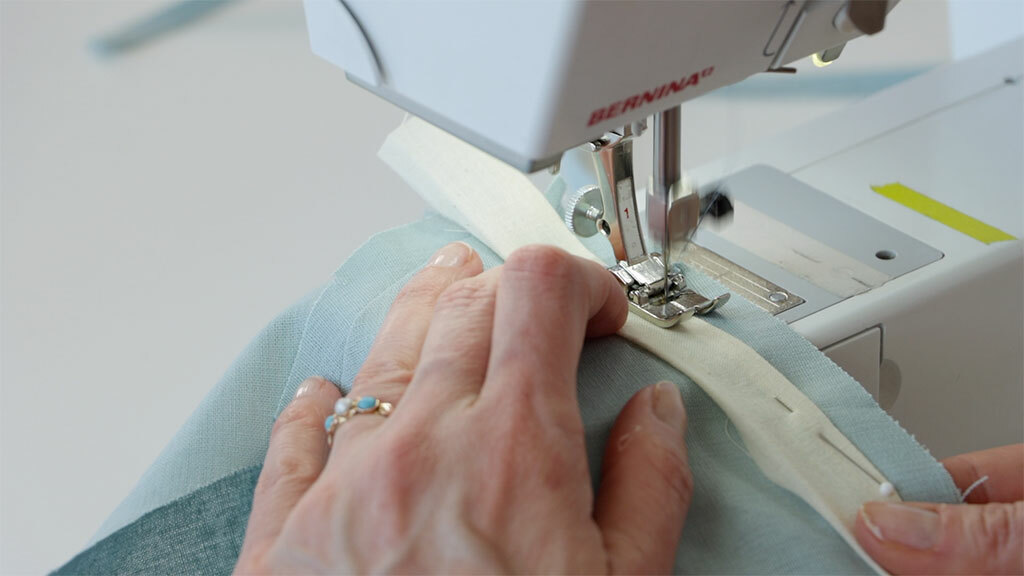
Now, on the wrong side, edgestitch the casing all the way around the hem. Leave a gap at the ends, sew those closed, and edgestitch the remaining opening.
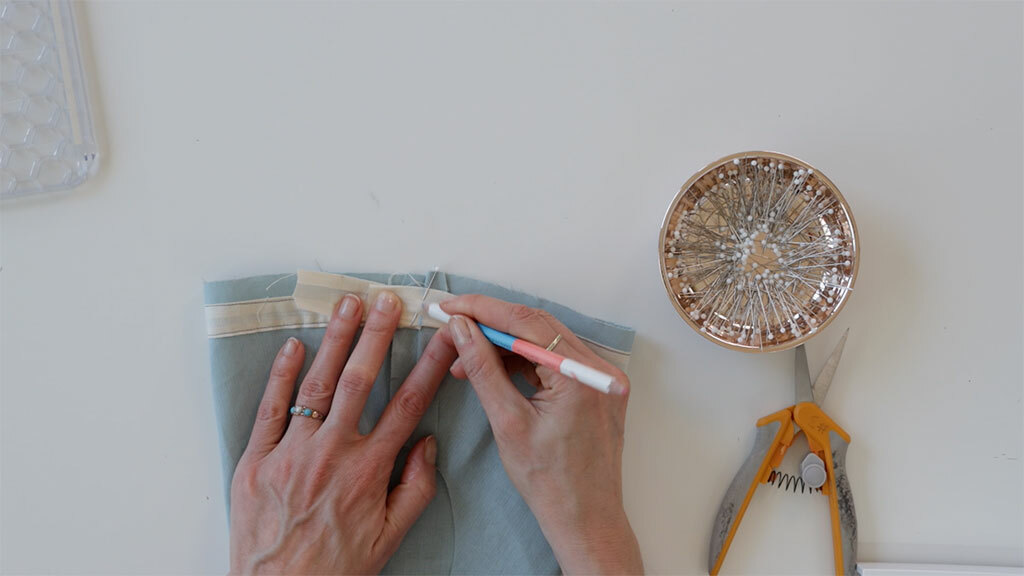
Then, thread your drawstring into one buttonhole, through the casing, and out the other. I like the use a safety pin.
Now let’s move on to the details I added to the top!
Detail 4: A Ruffle Neckline
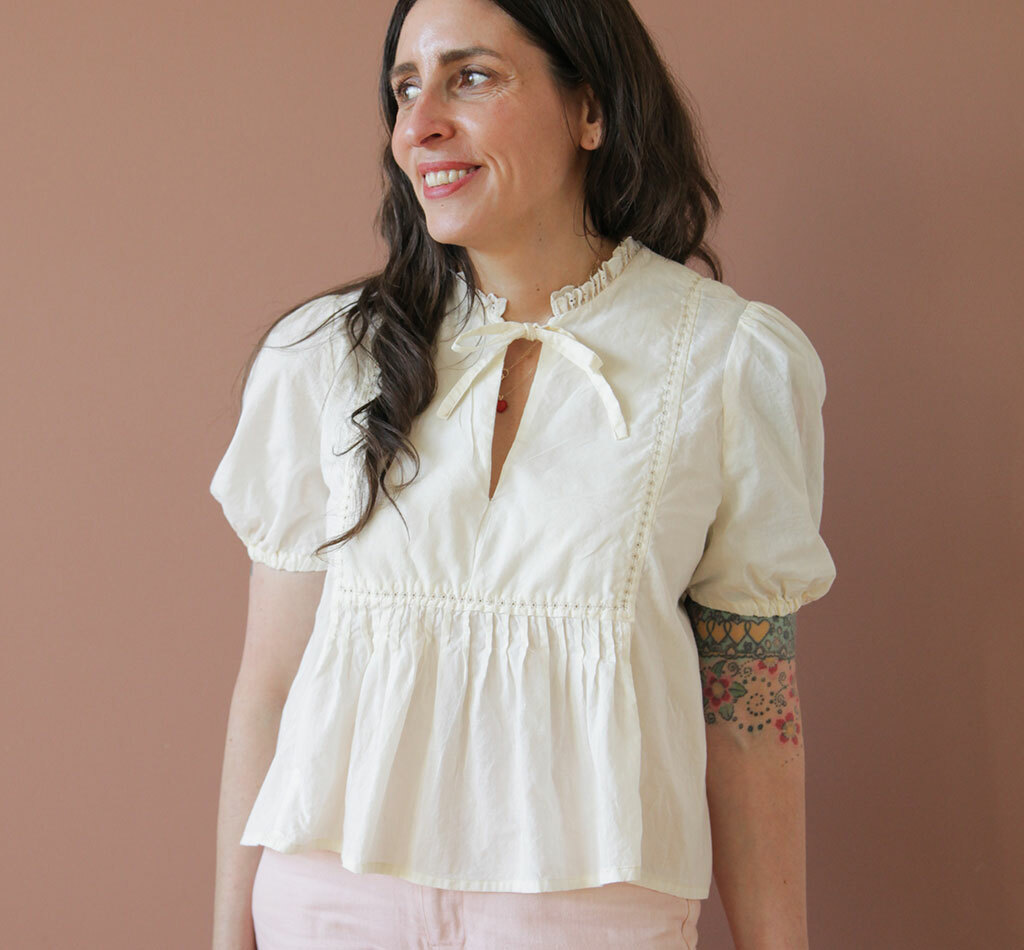
For this detail, I used a purchased ruffle trim and sewed it at the neckline. It’s super easy to do!
I just basted it at the neckline and turned the edges under with a little hem.
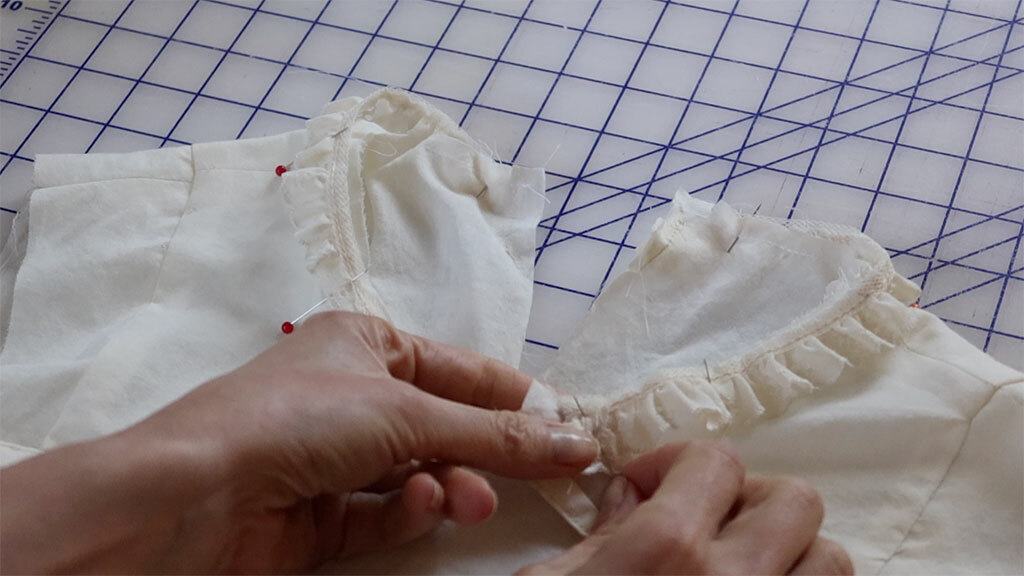
Then it just gets sandwiched between the outer yoke and the facing.
One thing to watch out for is that the lace shouldn’t go all the way to the center edge. You don’t want it to get caught in the center seam.
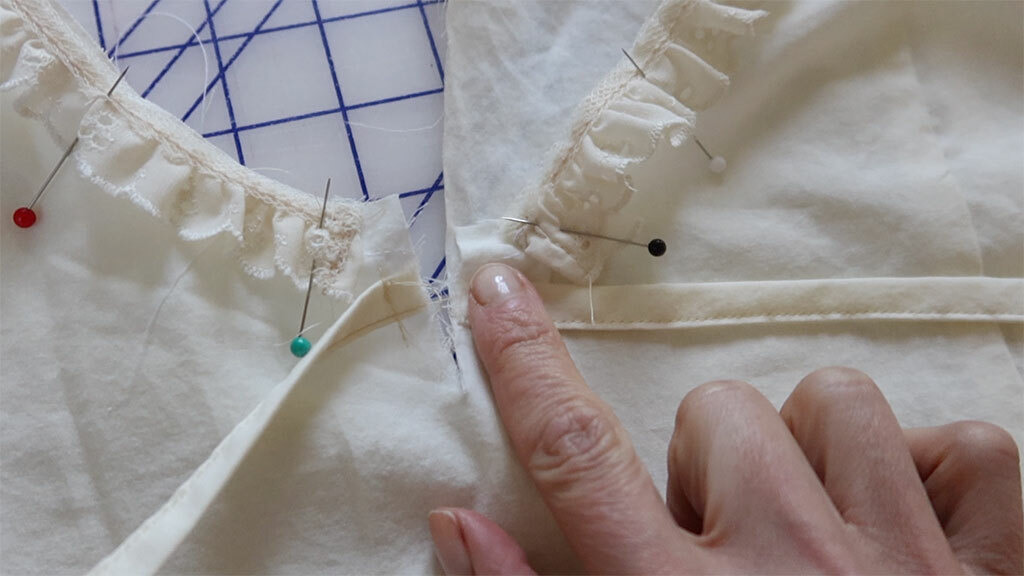
Leave a little gap for your seam. In my case, that was 3/8”. And that’s it!
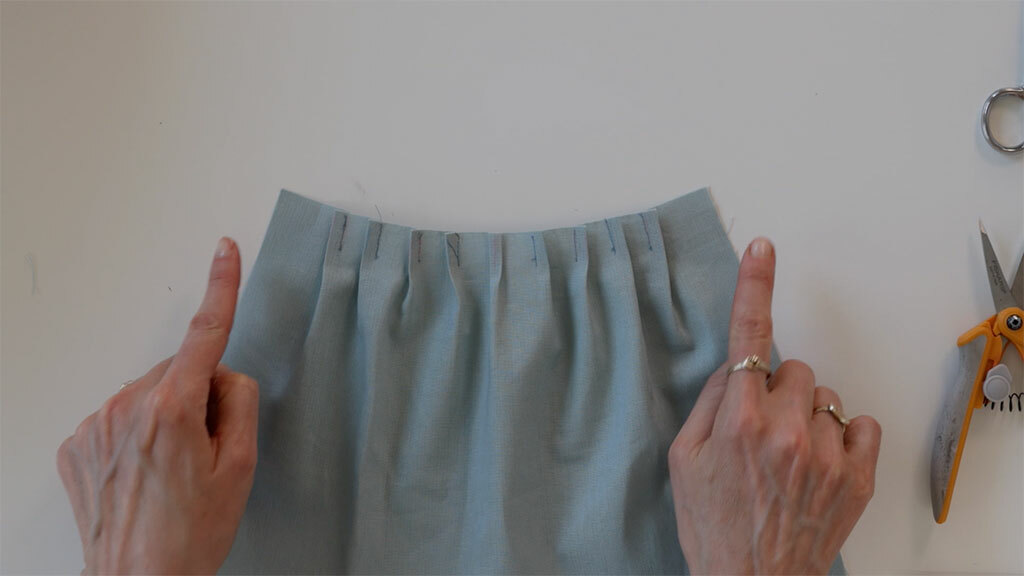
Detail 5: Small tucks

The Baker pattern has gathers, and I decided to convert them into tucks to give the shirt a more vintage look.
To do this, measure the difference between the two pattern pieces, your skirt and your bodice. When you know how much you need to subtract, that will be the total amount of take-up from the tucks.
Divide that by the number of tucks you want. Then, decide how far you’d like to space them apart. You could also cluster the tucks toward the center.
Mark the tucks on your fabric. Here’s a tip: I like to use two different colors so that I can clearly see which tuck is which.
Pin the tucks and sew them one at a time. I made mine about an inch and a half and backstitched at the end to secure. I then pressed them so they face outward.
Baste the top in place. Then, sew it to your other piece like you normally would.
Detail 6: Hemstitch
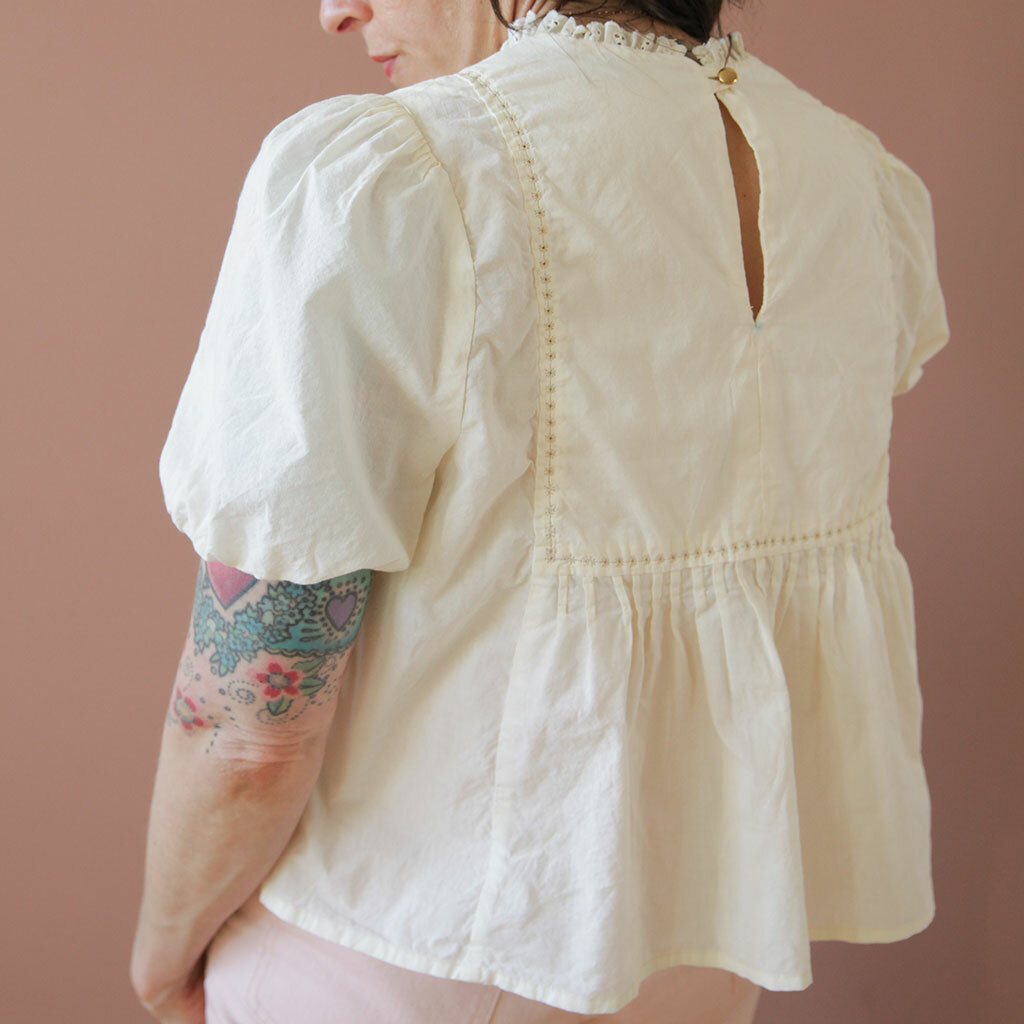
The final detail is hemstitching, which is really fun! You can read more in this tutorial here, but I’ll show you how it works.
Hemstitching is an easy detail to add to many projects, but it especially looks good on anything made of fine cotton or linen.
You can also use this on home goods. I have linen napkins at home that I made, and they look fancy, but it’s actually really easy to do, and there are a ton of variations you can play with.
You’ll need a few supplies:
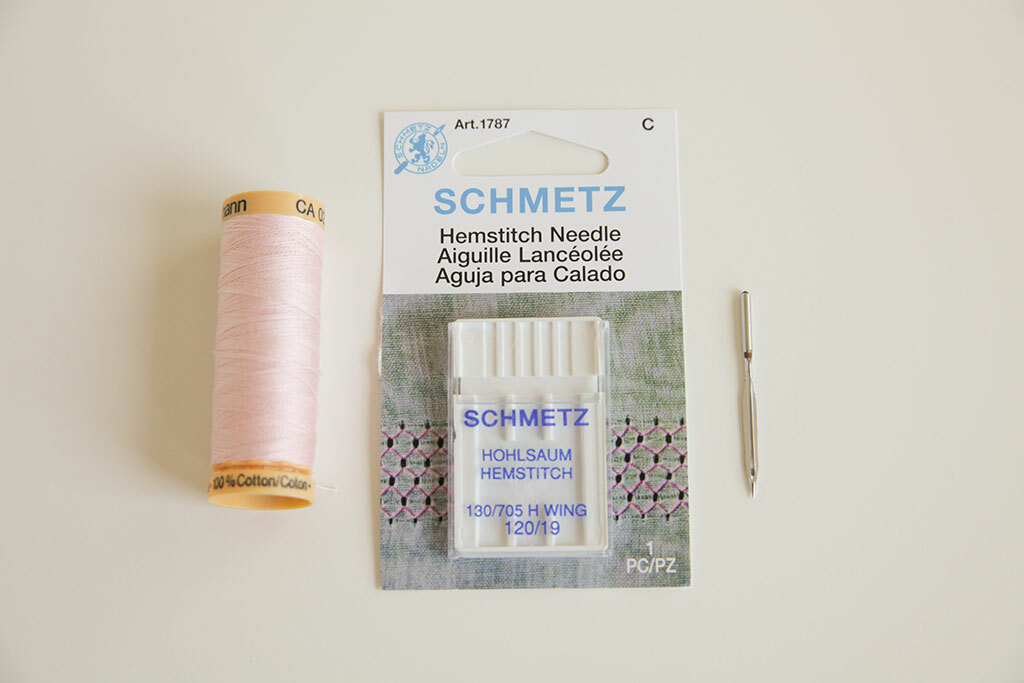
- Spray starch or stabilizer
- A wing needle (also called a hemstitching needle). This needle will create little holes in your fabric.
- 60wt cotton thread
- Tear away stabilizer (optional, but recommend)
- A water soluble marker or chalk.
First, mark a line where you want your hemstitching on your garment.
Use your cotton thread in the needle and bobbin. You can also use silk thread. They’re both a little heavier than your usual all-purpose thread.
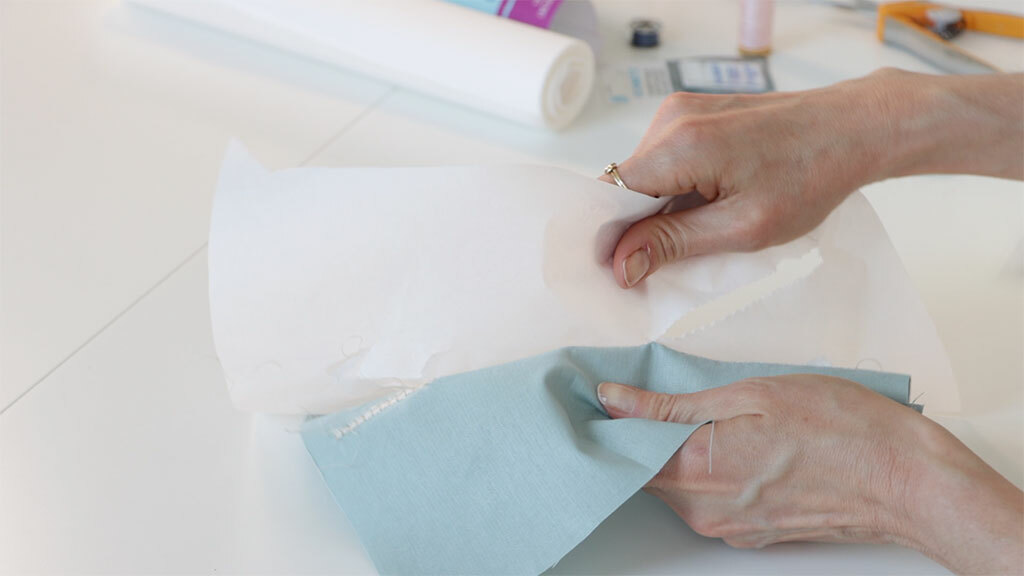
Spray your piece with starch to stiffen it, and pin some tear-away stabilizer to the wrong side. Insert your wing needle and thread it.
Now is the fun part! You get to select your stitch.
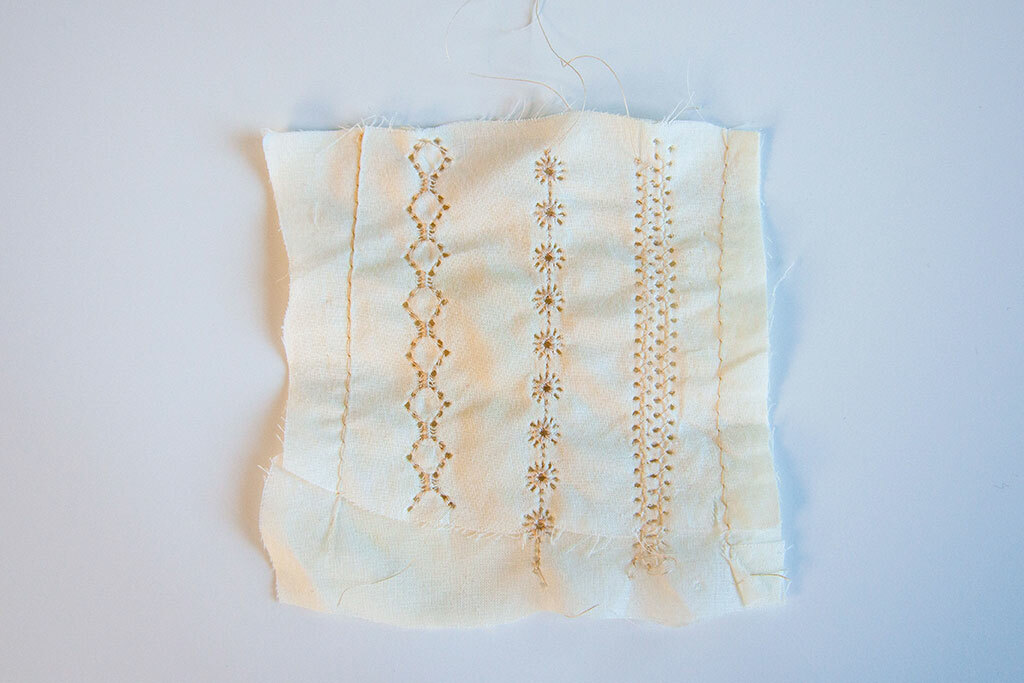
If your machine has decorative stitches, you have tons of fun options for this. I really like the daisy stitch or star stitch for this, but you can play around and get all different looks.
If you don’t have many stitches, I also really like the way a couple of rows of zigzag stitches look.
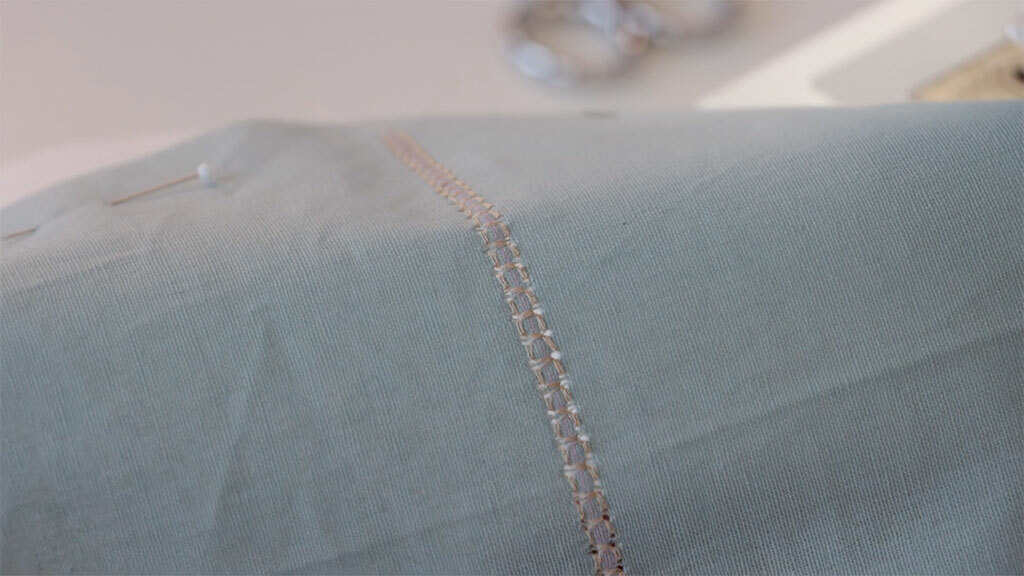
Now, just stitch! The wing needle creates those little holes to give it this really pretty heirloom look.

Do you like seeing these little sewing details you can add in? Let me know in the comments if you’d like to see more.
And which of these vintage-inspired details is your favorite?