Sign In

Have you ever put on a me-made garment and noticed the neckline just doesn't quite look... professional? Maybe it's rolling out, gaping, or just not laying quite right. I've been there, and I know how frustrating it can be when everything else about your garment looks perfect except
for that one crucial detail.
Here four different techniques that will help you achieve beautiful, professional-looking necklines every time. What I love most about having multiple methods in your toolbox is that you can choose the perfect finish for each project, rather than just defaulting to whatever the pattern suggests. For step by step instructions, make sure to watch the video.
Let's dive into each technique, and I'll share some insider tips I've learned from years of experimentation.
Simple Facing: The Classic Choice
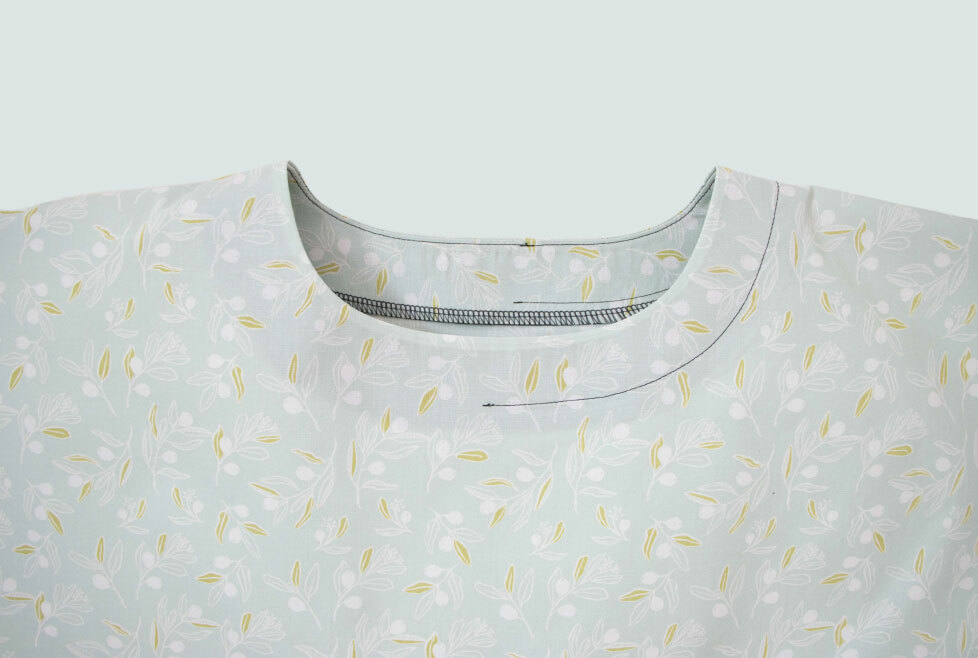
The simple facing is probably the most common neckline finish you'll encounter in patterns, and for good reason. It's perfect for structured garments and provides that crisp, tailored look we all love. Think of it as the foundation technique that every sewist should master.
Here's a tip I've learned: Don't skip the understitching! It might seem tedious, but it's absolutely crucial for keeping that facing perfectly in place. I actually keep a sticky note on my sewing machine that says "Did you understitch?" as a reminder.
All-in-One Facing: The Game Changer
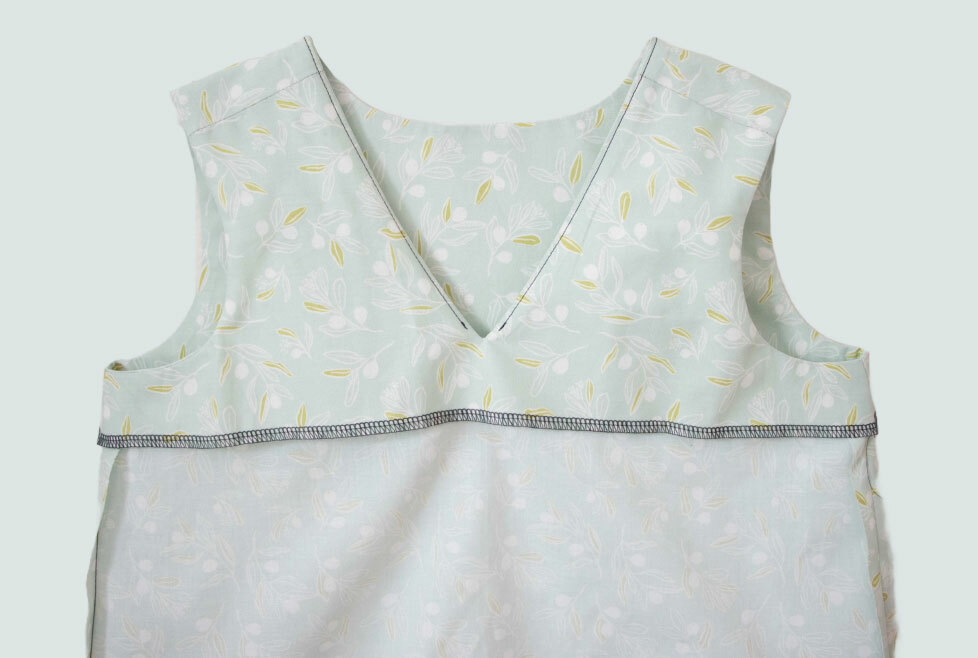
If you're working on a sleeveless garment, the all-in-one facing is about to become your new best friend. It's like giving your garment a partial lining that creates this beautifully smooth, professional finish around both the neckline and armholes. I especially love using this technique with lightweight fabrics where every little bump might show through.
The magical ingredient to this implementing this finish? The burrito method! Watch our entire video of how to do it here.
Here's a tip I've learned: Always grade your seams before turning. This reduces bulk and helps everything lay perfectly flat. Cut your facing seam allowance slightly narrower than your main fabric seam allowance.
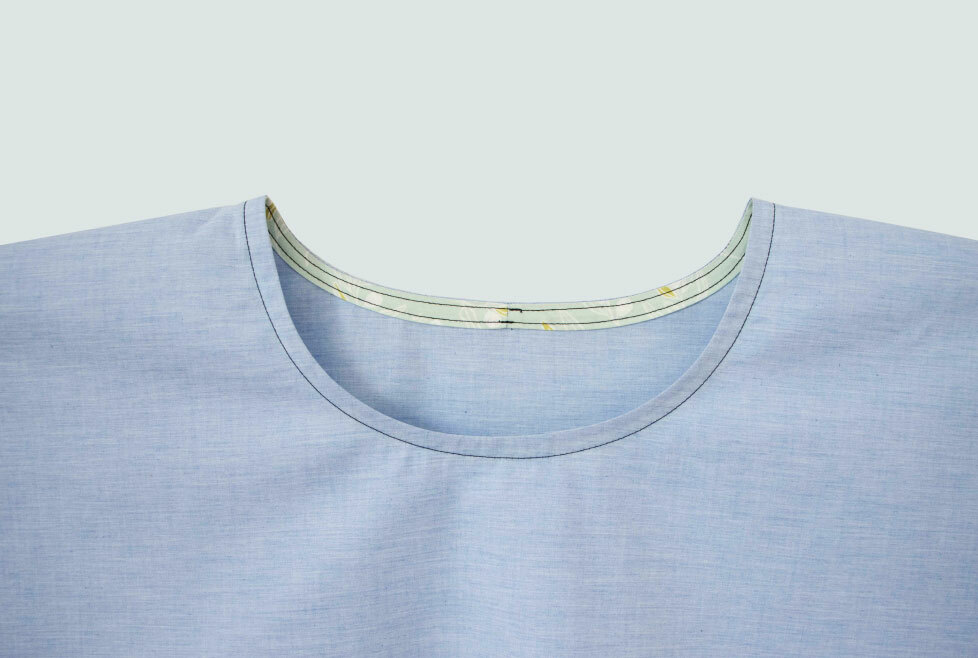
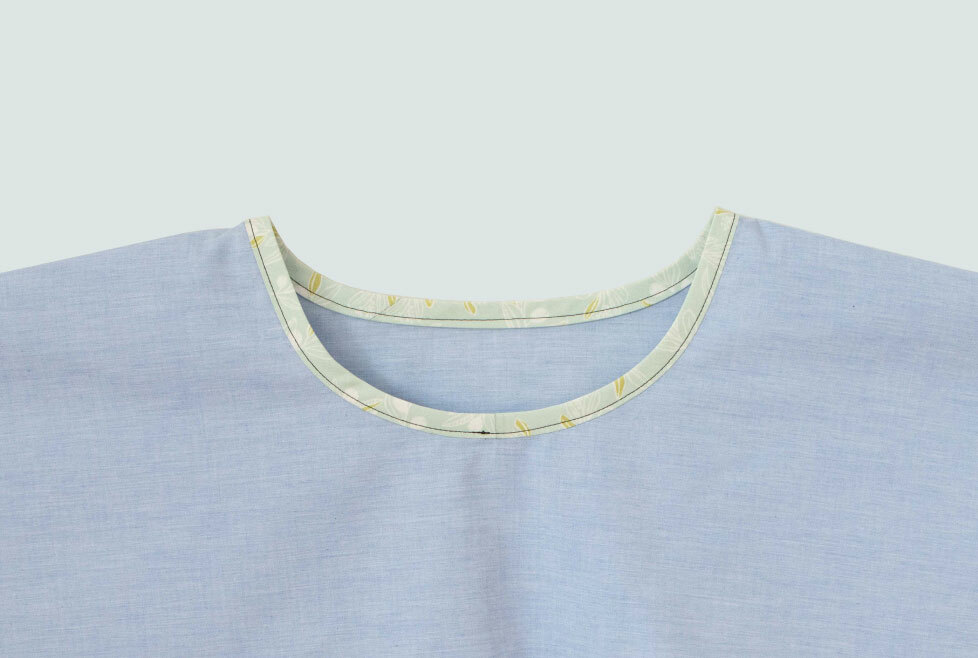
Bias Tape Facing: The Versatile Option
This is where we get to have some real fun with design. I actually love spending weekend afternoons turning my fabric scraps into bias tape – those striped and floral prints make the most delightful finishes later on. You can either match your main fabric perfectly or create beautiful contrast details.
The beauty of this technique is that you can swap it out for traditional facings in most cases. While standard facings are great when you need more structure, bias tape facing works beautifully for everything else - and it's especially perfect for sleeveless garments.
Here's a tip I've learned: Make sure to staystitch! Staystitching is a seatbelt for your fabric - it keeps everything exactly where it should be. You don’t have to staystitch your bias tape, just your neckline.
Bias Binding: The Professional Touch
For sheer fabrics or when you want that extra special finish, unlike a bias facing, bias binding creates a beautiful frame around your neckline that looks polished from both sides. It's perfect for those special occasion pieces where every detail matters.
If you're new to this or working with a tricky fabric, here's a really helpful tip: When you get to the part of wrapping and securing the binding, hand baste the fold in place first. Yes, it takes a few extra minutes, but it's worth it for perfect results. You can remove the basting stitches later.