Sign In

DEK: A step-by-step guide to understanding, sewing, cutting, and troubleshooting buttonholes for perfect results every time.
When I ask people what they find trickiest in sewing, buttonholes are always at the top of the list. They can feel intimidating, but with a few key techniques, buttonholes will become just another simple step in your sewing process.
If you’ve struggled with buttonholes in the past, have no fear. I’m going to share all the secrets you need to know, from start to finish. This is your complete guide to buttonholes. Watch the video above to see these tips in action, and keep reading for detailed notes.
In this guide, you’ll learn about:
- The tools and notions you’ll need
- How to select the right type of buttonhole for your fabric
- How to mark buttonhole placement
- Why you should stabilize your fabric
- How to create, cut, and reinforce your buttonholes
- Plus, some tips for troubleshooting common buttonhole issues
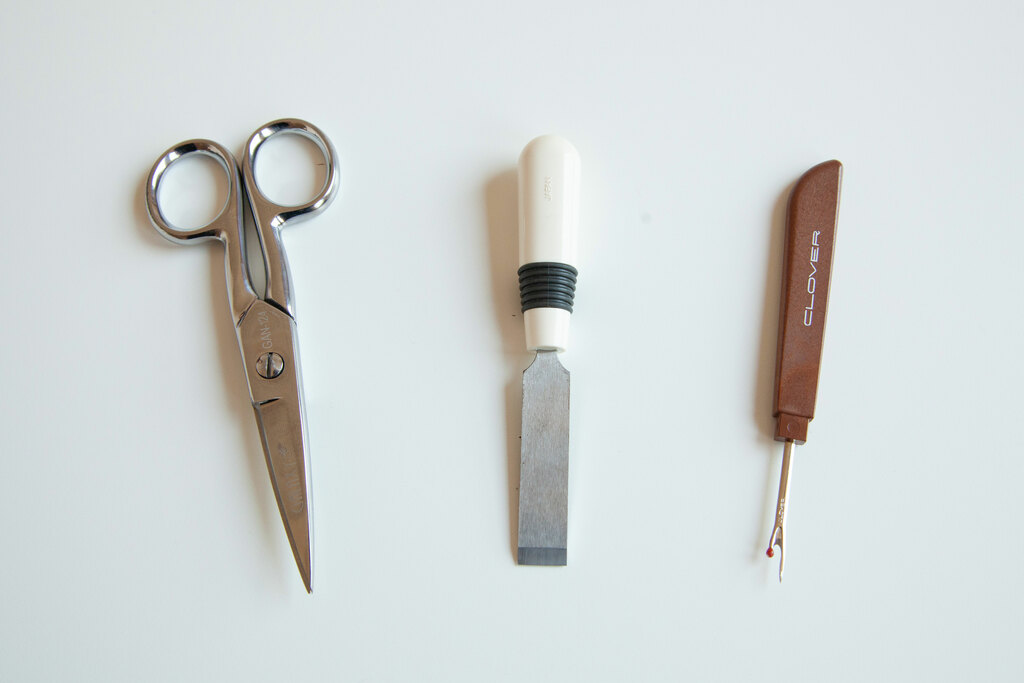
The Tools and Notions You’ll Need
Before you start, make sure you have the right tools. A good setup makes all the difference when it comes to smooth buttonhole sewing.
You’ll need:
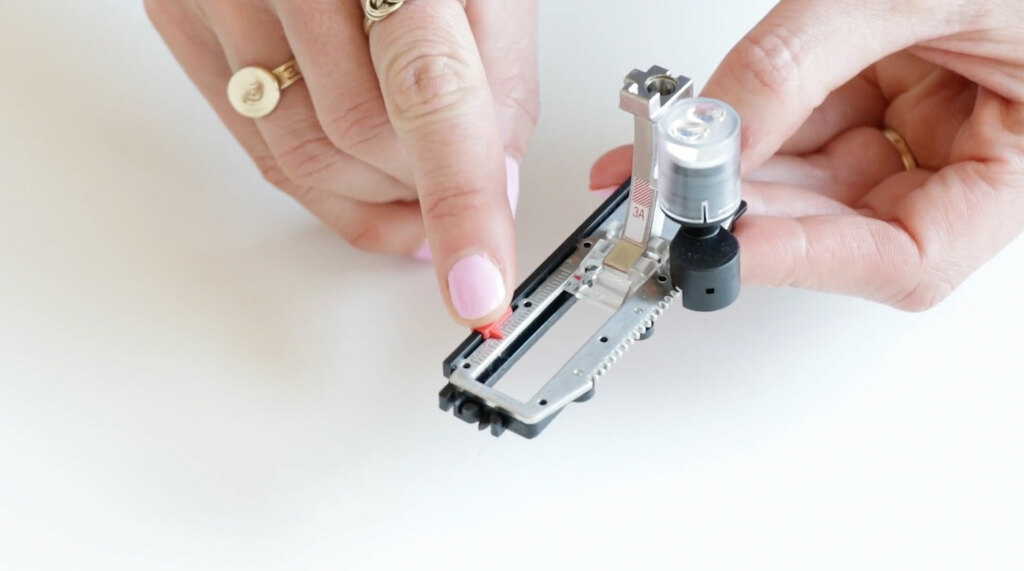
- A sewing machine with a buttonhole foot (some machines have automatic buttonholes, while others require manual stitching)
- A water-soluble fabric marker
- Interfacing or stabilizer
- Sharp scissors or a buttonhole cutter (this specialized tool makes clean cuts and precise finishes)
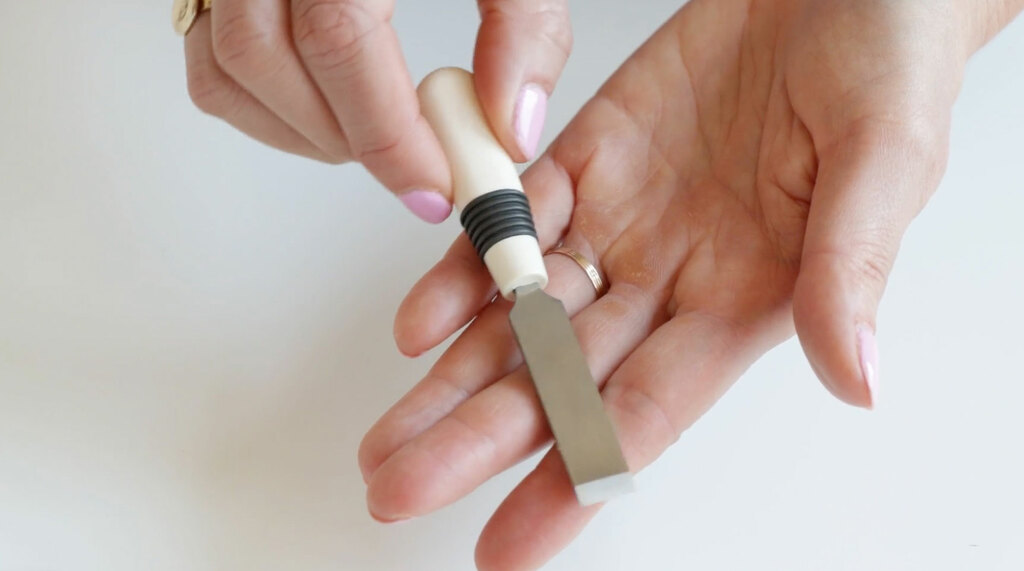
What’s a buttonhole cutter? It’s a sharp tool designed to cut your buttonholes with ease, helping you avoid fraying or damaging your fabric.
If you don’t have one, sharp scissors work too!
Choosing the Right Type of Buttonhole
Not all buttonholes are created equal. Depending on your fabric and the type of garment you're sewing, you’ll want to select the right buttonhole style for the job.
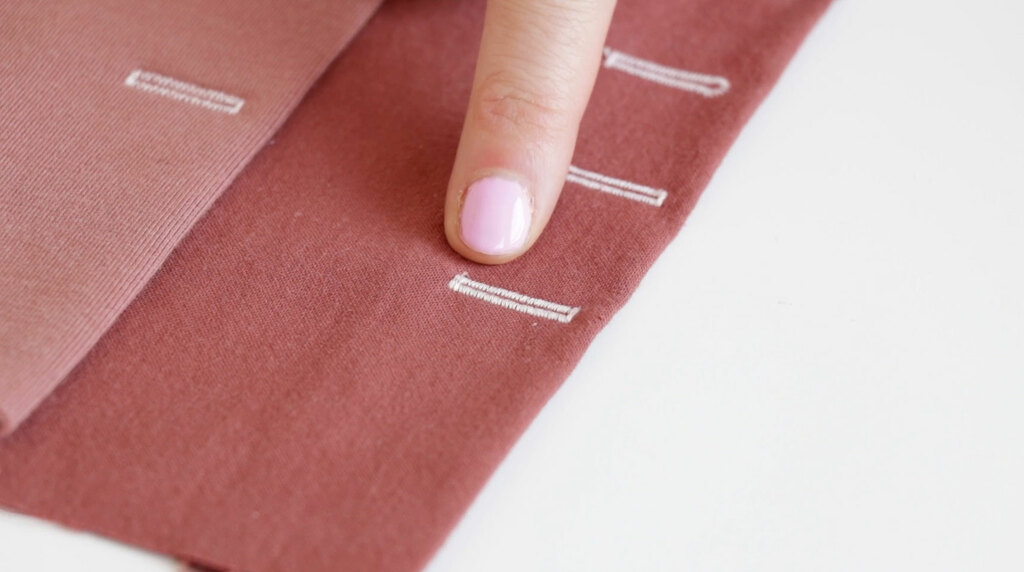
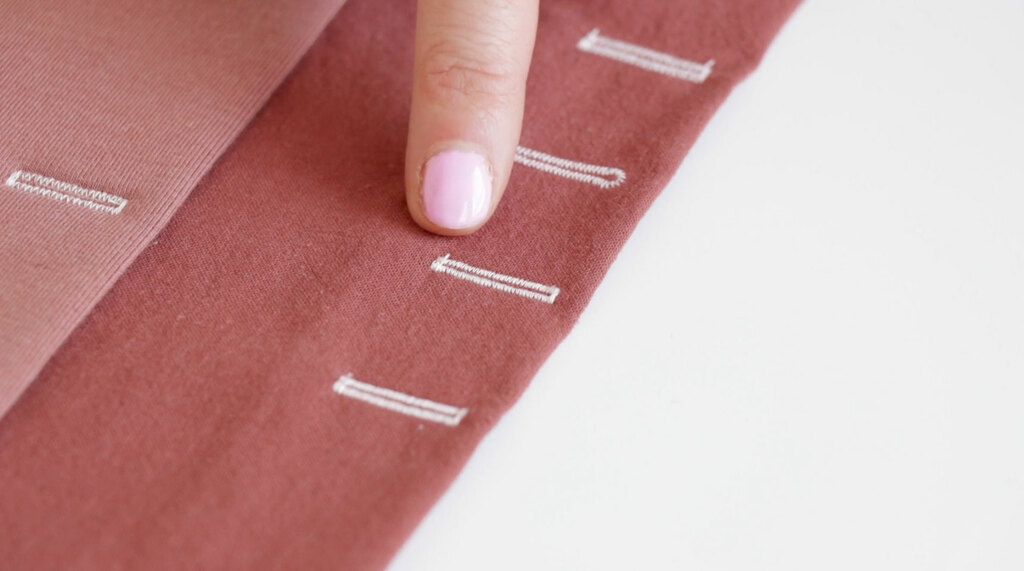
Classic rectangular buttonhole: A regular buttonhole is ideal for medium-weight woven fabrics, and it will likely be the buttonhole you use most frequently.
Narrow buttonhole: Perfect for lightweight fabrics, like silk or voile. If you don’t have this function on your machine, you can reduce the width on your buttonhole stitch to make it more delicate.
Keyhole buttonhole: These are best for heavier fabrics, jackets, or coats. The round end helps accommodate thick buttons.
Stretch (or knit) buttonhole: This buttonhole is designed for knits and stretchy fabrics. It moves with the fabric. If your machine doesn’t have this function, increase the stitch length to add flexibility to the buttonhole.
Corded buttonhole: This is a type of buttonhole reinforced with a cord to provide extra strength and durability. It’s particularly useful for fabrics that might fray easily, such as knits, lightweight wovens, or delicate fabrics.
Bound buttonholes: You can create a bound buttonhole as a tailored option for outerwear or more formal garments. It’s almost like a little welt pocket. If you want a tutorial on bound buttonholes, let me know!
You can sew all of these on a machine, but you can also hand sew a buttonhole, which is a beautiful couture detail for special projects.
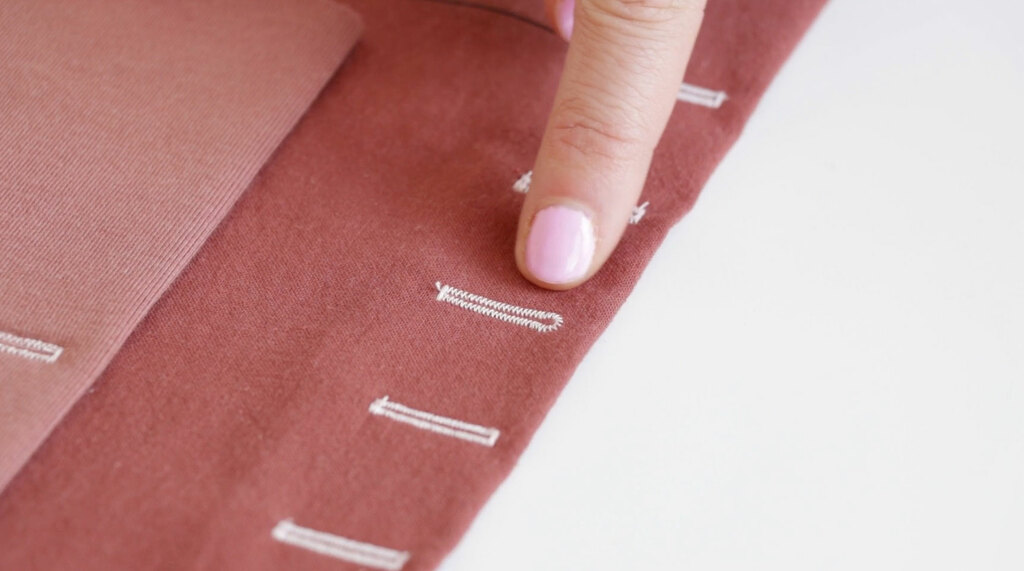
Marking Your Buttonholes

Most patterns will include buttonhole markings to match the recommended button size. If you're using a different size button, measure the button and add about 1/8 inch (3 mm) to the length to ensure it fits.
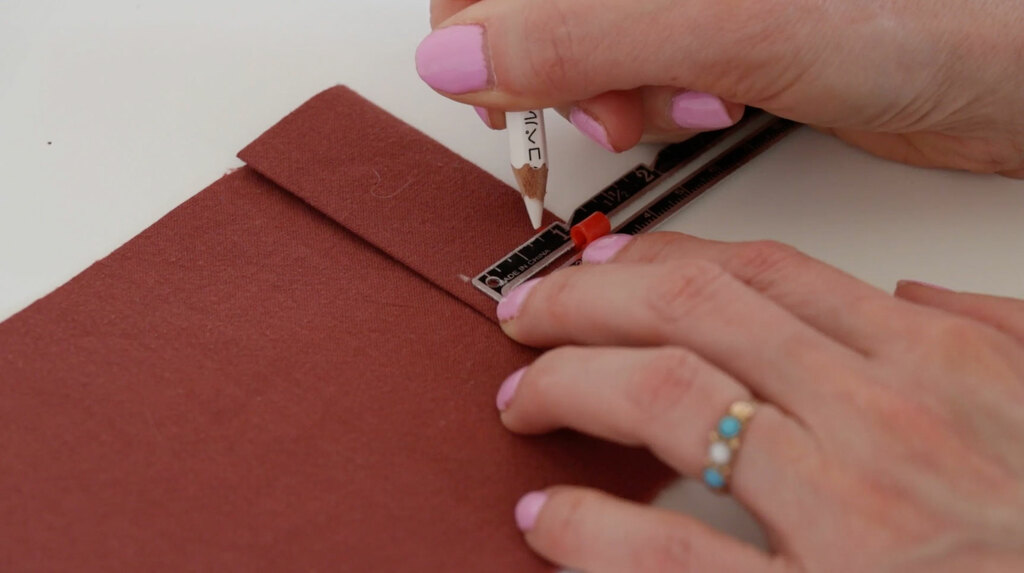
Use a water-soluble marker to mark the start and end points of each buttonhole. If you're adjusting button placement, consider using an expandable button gauge to ensure even spacing. Larger buttons may require you to move buttonholes further from the edge of the fabric, while smaller ones might need to be placed closer.
Stabilizing the Fabric
Stabilizing your fabric is key to long-lasting buttonholes. Most patterns call for interfacing in areas where buttonholes will go. Interfacing strengthens the fabric, making sure your buttonholes can withstand repeated wear.
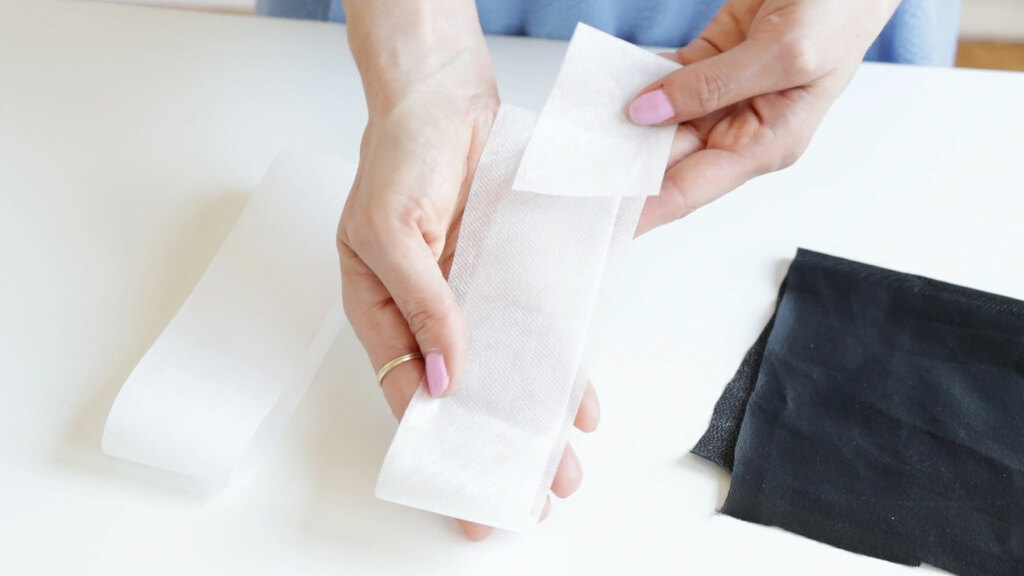
For lightweight or stretchy fabrics, consider using a wash-away or tear-away stabilizer in addition to interfacing. This prevents the fabric from puckering or shifting as you sew.
Setting Up Your Sewing Machine

Once your fabric is marked and stabilized, it’s time to set up your machine:
Attach your buttonhole foot and select the stitch that matches the buttonhole style you want.
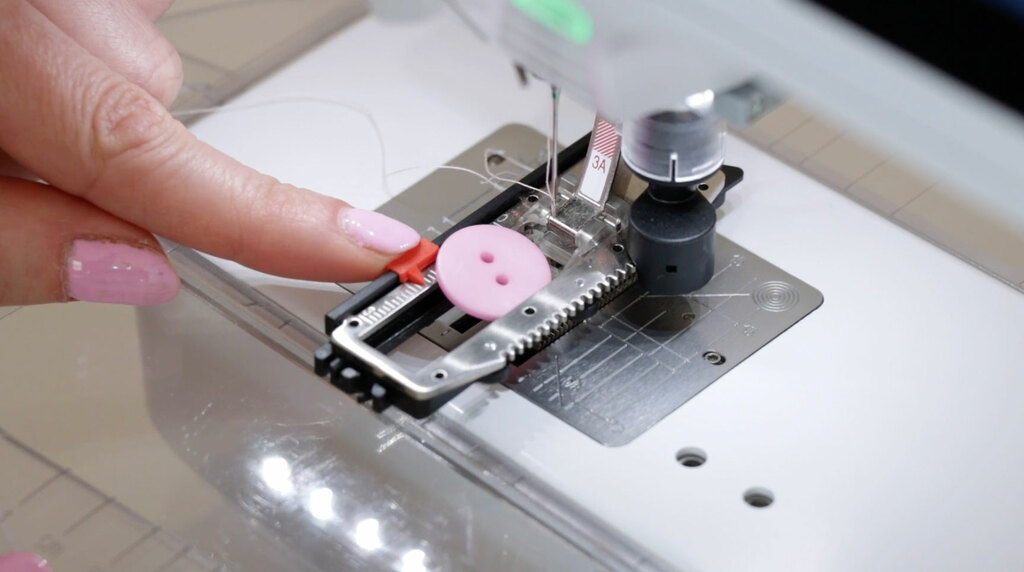
Use the buttonhole foot’s slider to mark the length of the buttonhole.
Follow your machine’s manual for specific settings. Each machine has its own instructions for creating buttonholes, so it’s worth taking a moment to check.
Here's an important tip: Never start a buttonhole on your actual garment without testing it first. Use a scrap piece of fabric that matches your project, including any interfacing or stabilizer.
Test your buttonhole and make sure:
- Your button fits easily through the hole.
- There are no skipped stitches or tension issues.
Adjust the buttonhole length if needed before sewing on your garment.
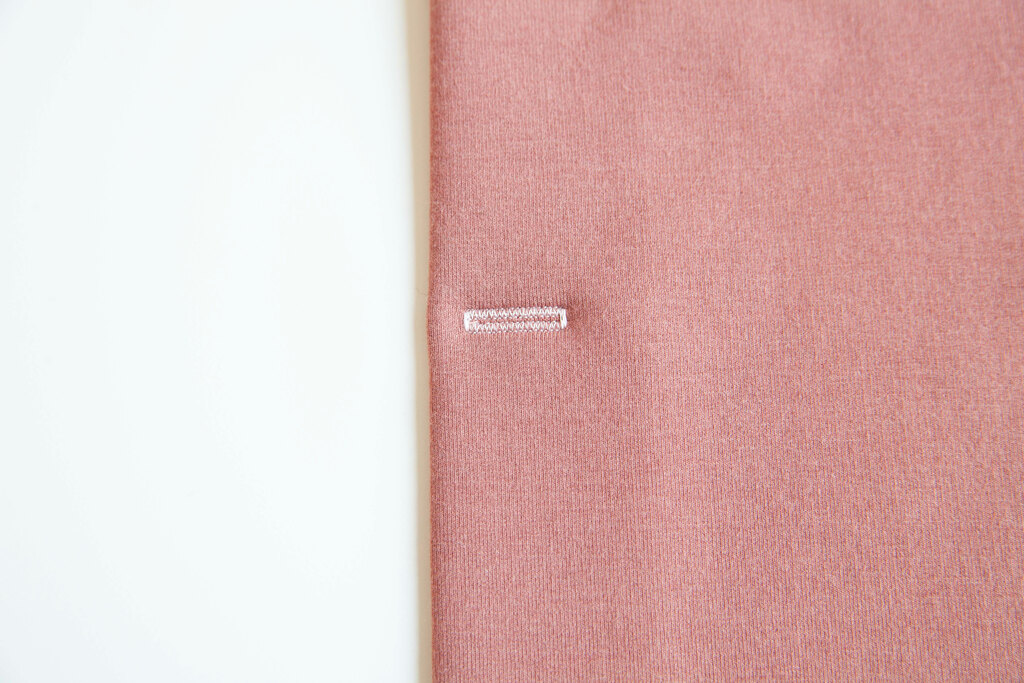
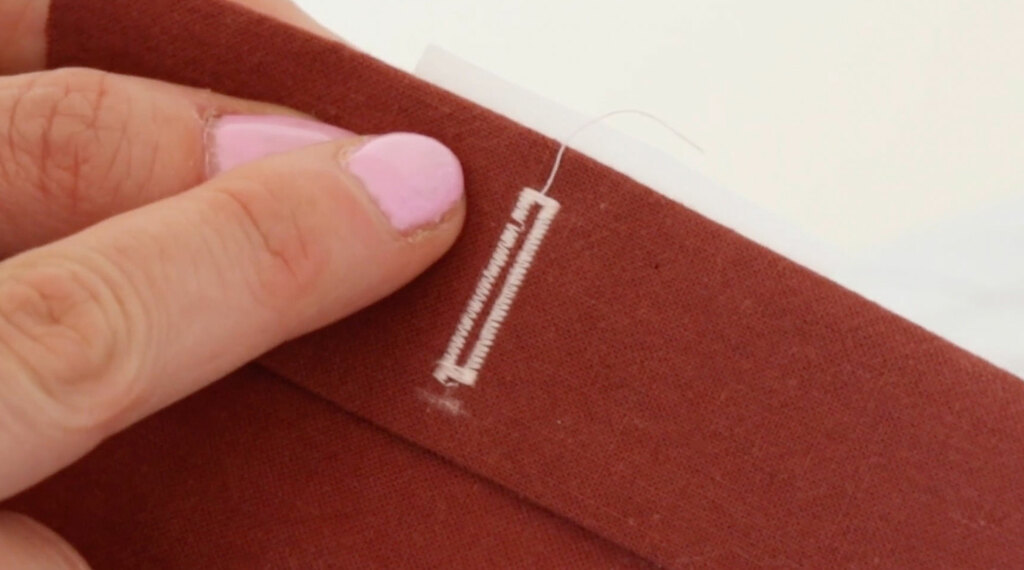
Creating the Buttonhole
To sew the buttonhole, start stitching at the top of your marked line.
Sew continuously to avoid stopping or pausing mid-stitch.
Once you reach the end of the buttonhole, use the backstitch function on your machine to finish it off.
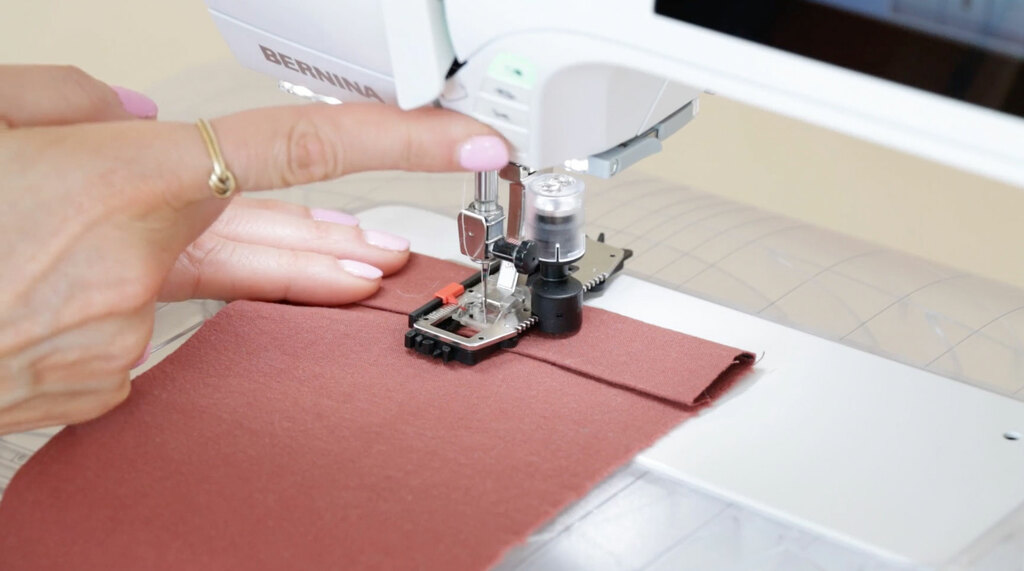
Repeat for the remaining buttonholes, following the same process.
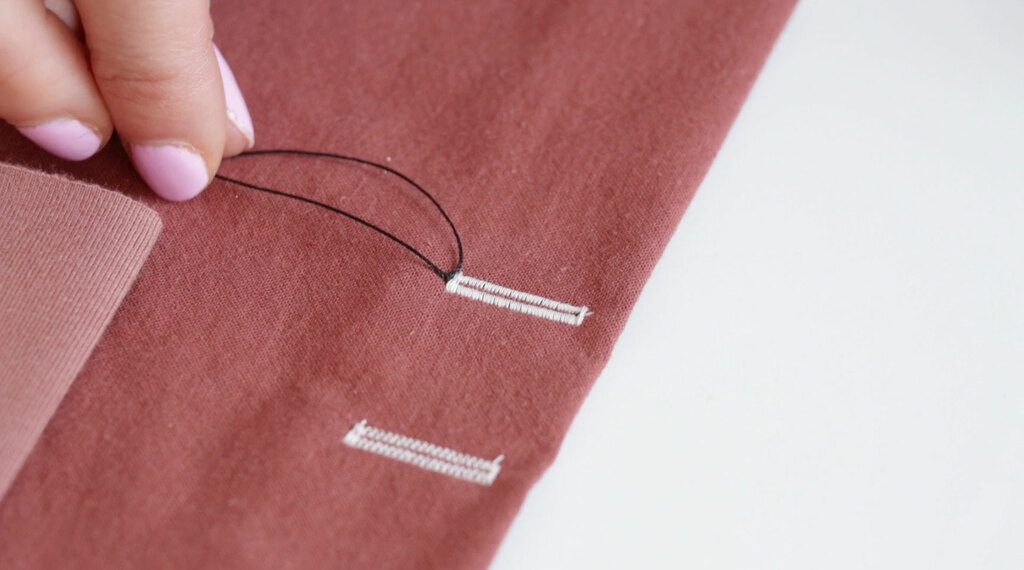
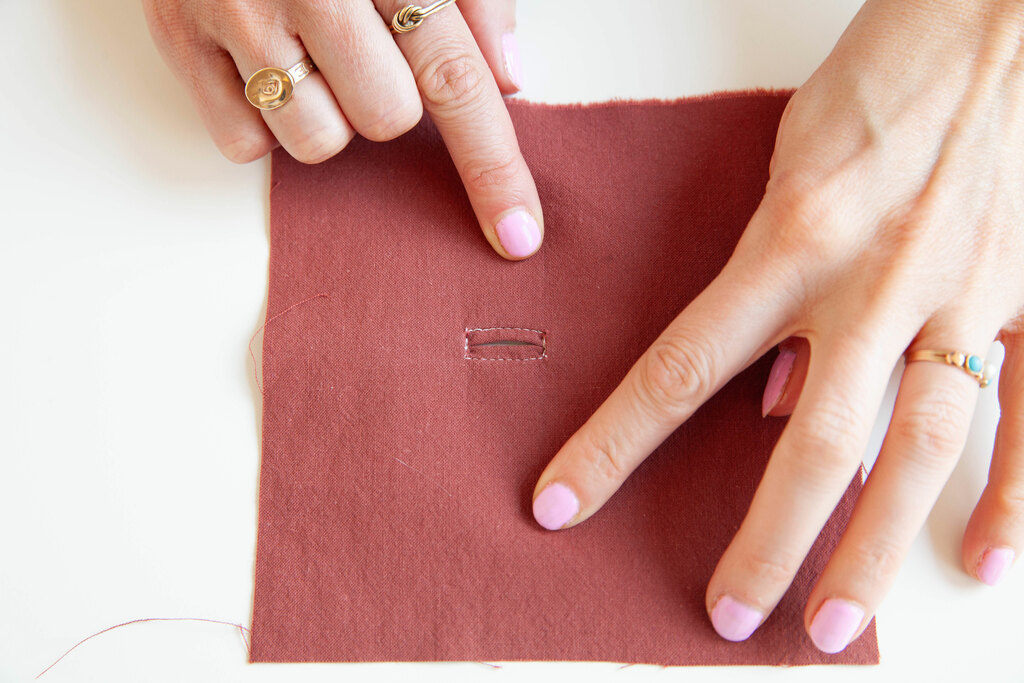
Cutting the Buttonhole
Cutting your buttonhole is a delicate step. If you use sharp scissors or a seam ripper, place pins at both ends of the buttonhole to prevent overcutting. Start from the center and carefully cut towards the ends.
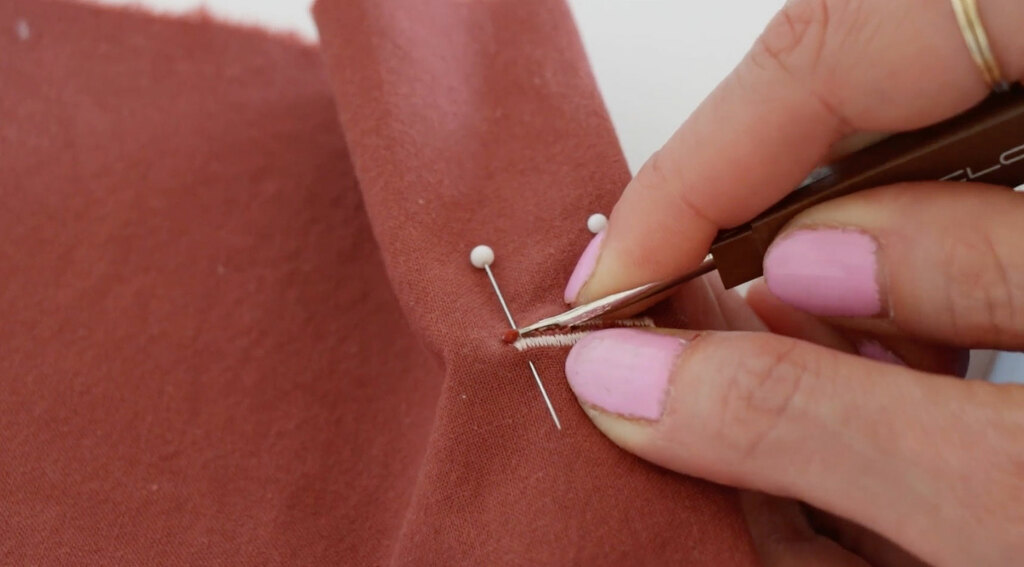
If you use a buttonhole cutter, just place your garment over a cutting mat and chisel it.
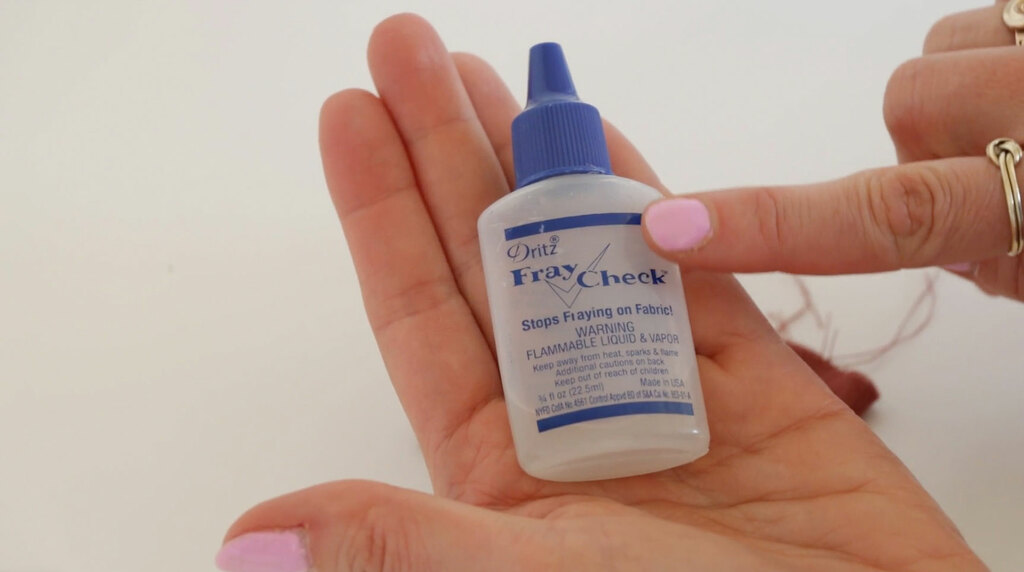
Reinforcing the Buttonhole
Here are a few tips for reinforcing your buttonholes to make sure they last:
- After you sew, press the stitches gently with an iron.
- Apply fray check to the edges before cutting and it will secure your buttonhole and keep the threads from coming loose. Avoid putting fray check on any water-soluble markings, because it will seal the marking and make it permanent. So, rinse of the markings before applying fray check.
- Add bar tacks at the ends for extra strength, especially on thick fabrics.
Fixing Common Buttonhole Issues
Here are a few tips for reinforcing your buttonholes to make sure they last:
- After you sew, press the stitches gently with an iron.
- pply fray check to the edges before cutting and it will secure your buttonhole and keep the threads from coming loose. Avoid putting fray check on any water-soluble markings, because it will seal the marking and make it permanent. So, rinse of the markings before applying fray check.
- Add bar tacks at the ends for extra strength, especially on thick fabrics.
If you encounter problems, here are a few troubleshooting tips:
- Puckering fabric? Adjust your upper thread tension and be sure to use stabilizer when sewing your buttonholes.
- Uneven buttonholes? Double-check your fabric alignment or recalibrate your buttonhole foot.
- Skipped stitches? Try rethreading your machine, changing the needle, or lowering the tension on thicker fabrics.
Final Tip: Using Buttonhole Gimp
Want to create a super stable buttonhole? Try using buttonhole gimp. It’s a thicker thread that reinforces the buttonhole, helping it hold its shape. You can loop the gimp onto your buttonhole foot, and your machine will stitch over it, giving you a sharp, defined finish. This is especially useful for tailored garments or stretchy fabrics.
Read this article and watch the video to learn how to use it: How to Sew Tricky Buttonholes.
Now that you’ve got all the tips you need, you’re ready to start sewing buttonholes with confidence!